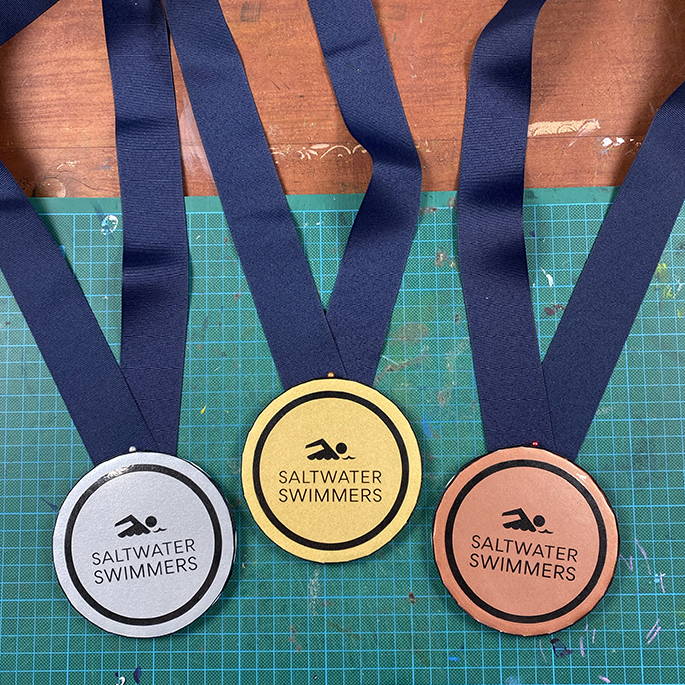
How to make your own Olympic Style Medals
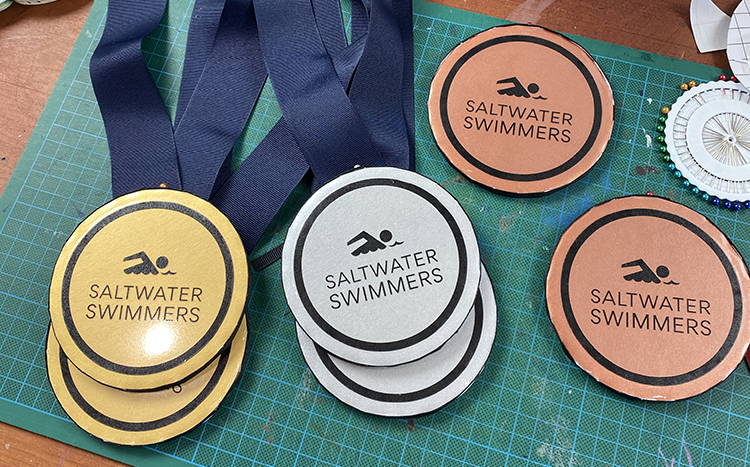
Mrs Red is a keen ocean swimmer and is also involved with a large group of ocean swimmers who come together to learn surf skills etc. During winter, the Saltwater Swimmers come together on a Sunday morning at different beaches around the Gold Coast. Mrs Red does the water safety for this group. After the session, the two coaches, photographer, and myself along with Stevo, the other water safety, we always catch up for a debrief over a coffee and usually talk about the morning and the next Sunday. Given that the Tokyo 2020 Olympics is in full swing we wanted to hold our own Olympics and I said I would make the medals. So that is why the logo on these medals say Saltwater Swimmers. Unfortunately, on the Saturday we were forced into another snap lockdown, here on the Gold Coast as COVID again rears its ugly head in the community and we could not go through with our Olympic Saltwater Sunday which was such a shame as we were all looking forward to it. And we have since heard the lockdown has been extended for another week, so we are unable to come together again at end of this week.
As I have taken photo’s throughout putting these medals together, perhaps others can benefit from it when it comes to making some DIY medals for your special Olympic style event. I was super chuffed with how these turned out and especially given I used very simple and easy to purchase art supplies!
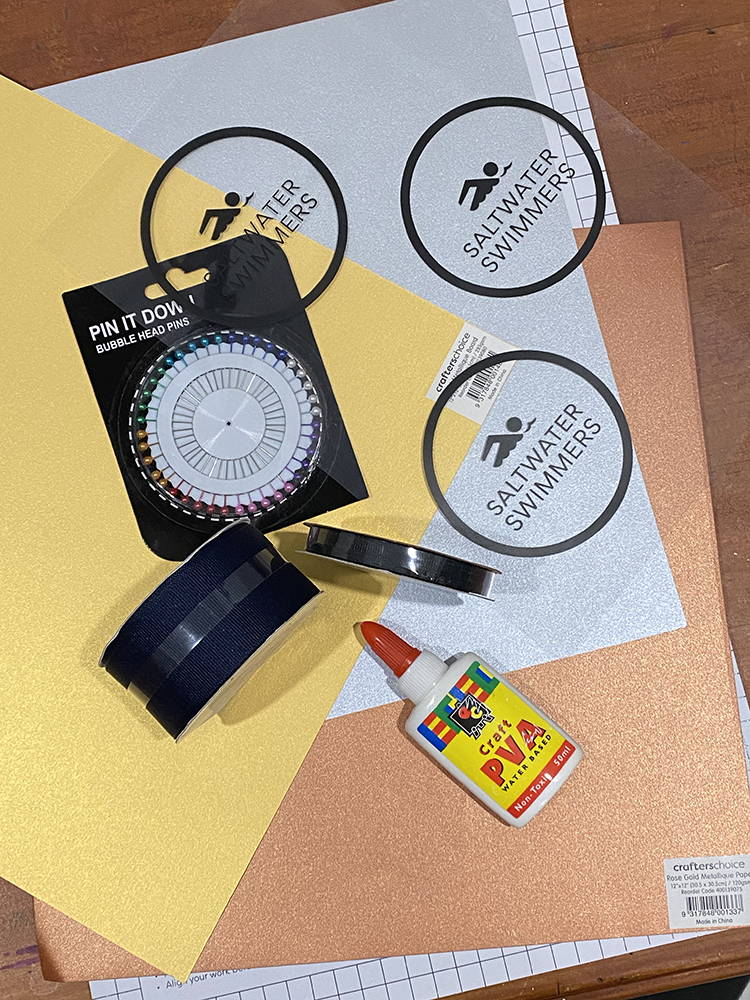
What you will need to gather if you are making gold, silver, and bronze medals:
• Sparkle paper (try Spotlight if in Australia as bronze is hard to find)
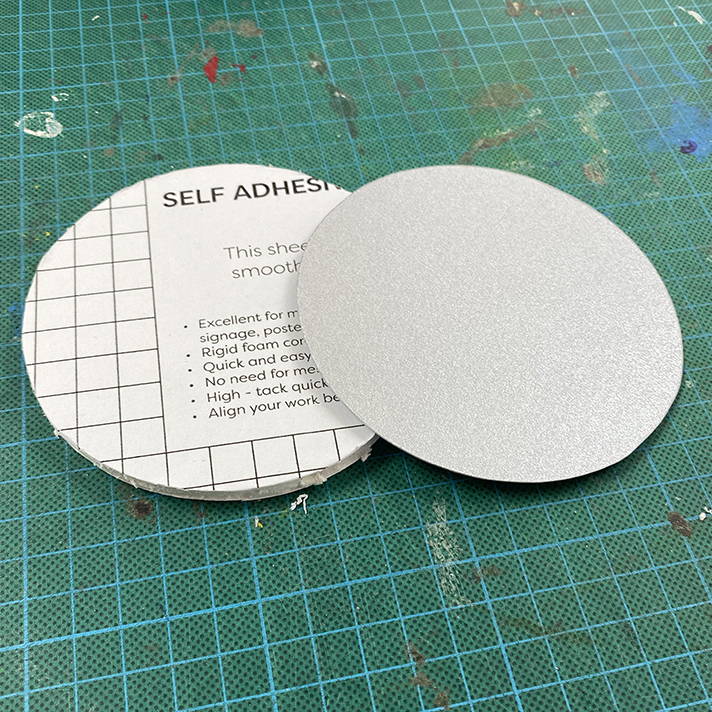
• Foam board (I bought the adhesive one to save time)
• Graphite pencil
• PVA glue
• Ribbon the width of foam board (colour up to you)
• Ribbon to make the sash of each medal
• Sewing pins with the sparkly bubble head
• Stanley knife and cutting board
• Scissors
• Print on transparent film (acetate) of your logo
• Contact (clear adhesive film)
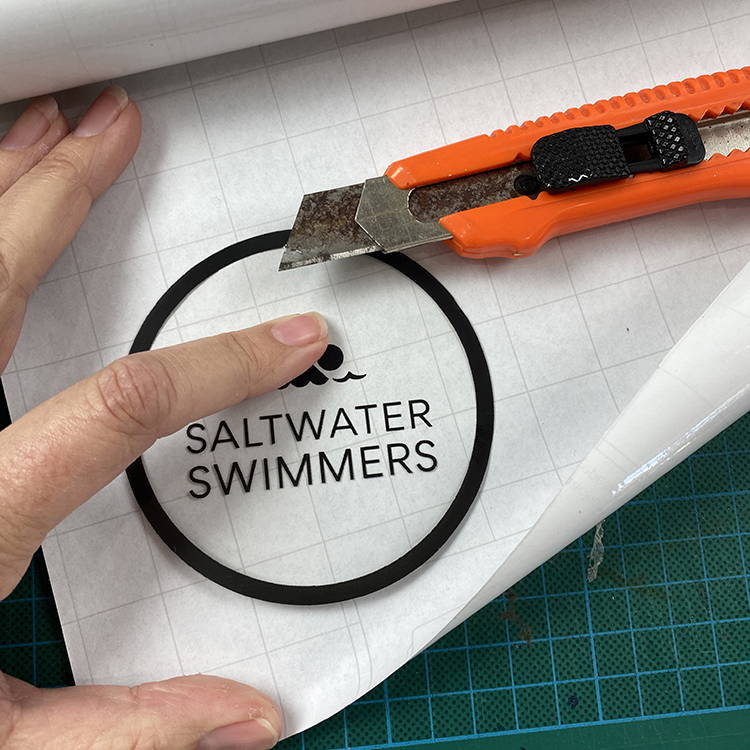
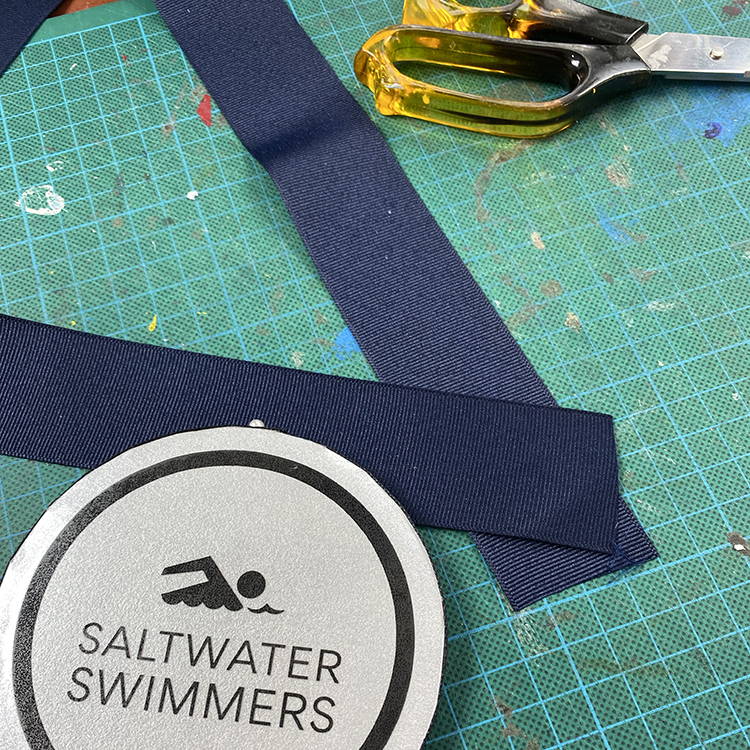
Step 1 - cutting logo out
Have your logo or numbers printed onto acetate the size you want your medals to be. Then with your Stanley knife, cut these out. It’s good to have a black ring around edge to it gives you a guide to cut the perfect circle.

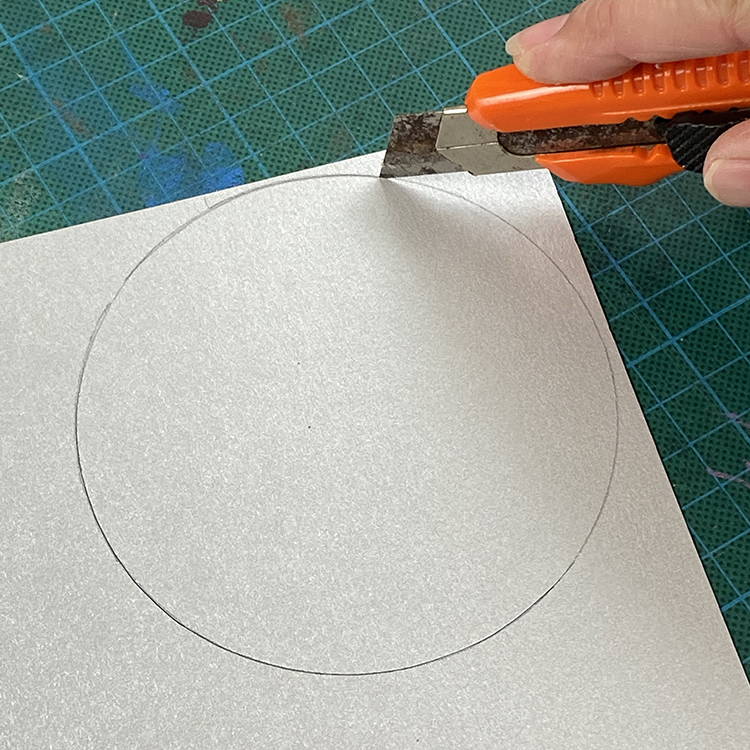
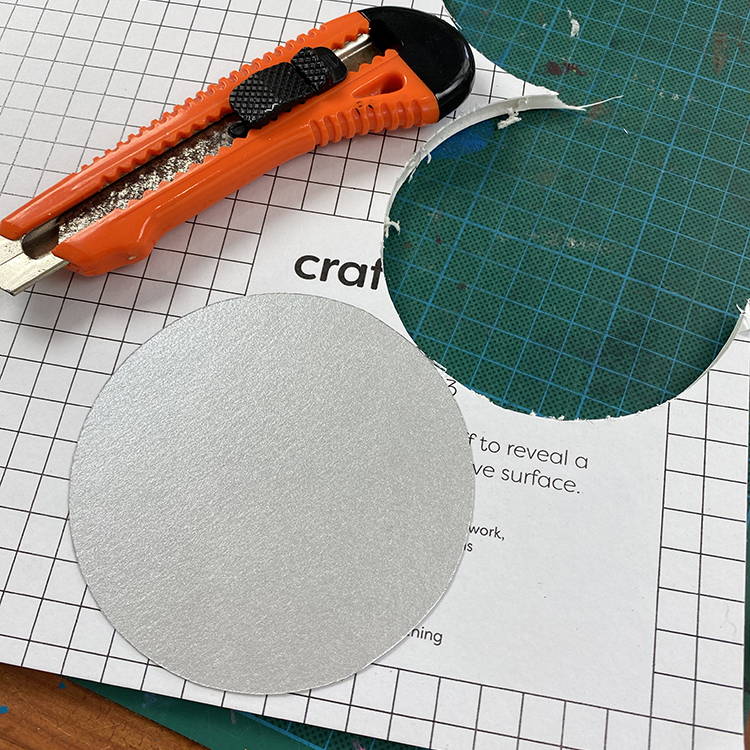
Step 2 - cutting front of medal
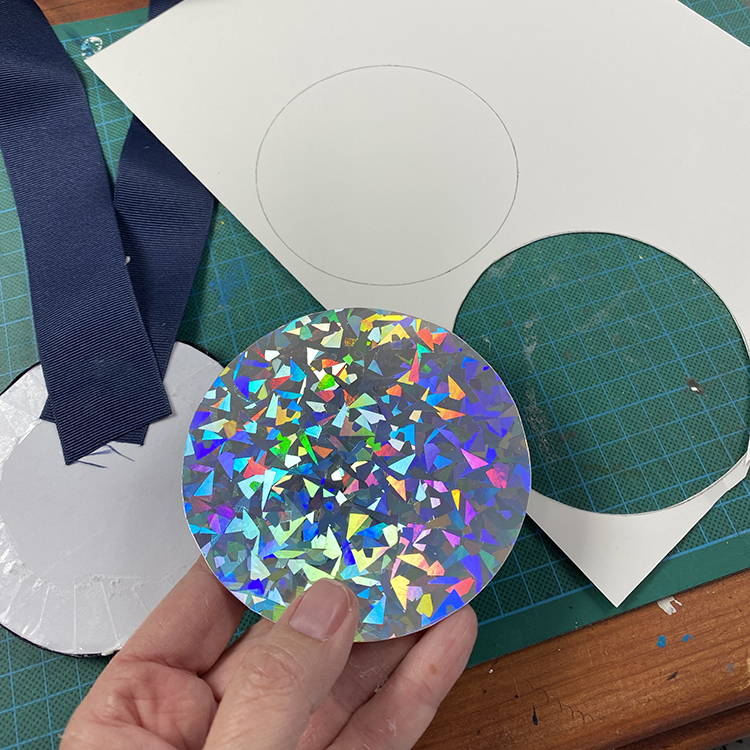
Find something that has a circle base that is just larger than your printed logo. I used a small bucket that I use for when I’m painting. Trace your circle onto the sparkle paper and then cut these circles out, using your Stanley knife again.
Step 3 - cutting foam board
Now with the same bucket, trace more circles onto the foam board. An adult must do this next step as it can be slightly difficult if you haven’t used a Stanley knife before. Make a fine cut around the circle in the foam board and repeat this process putting a little more force on the knife as you cut your way through the foam board. It doesn’t have to be super clean edges as you will cover them up with ribbon. Mine definitely looked a little hacked in areas!
Step 4 - sticking medal to foam
If you purchased adhesive foam board, now is the time to peel the adhesive layer off. If you are not using adhesive, then you will now need to put a thin layer of PVA glue over all of one side of your foam board cut out. Then lay your sparkle paper down on top. Repeat this for the remaining medals in different colours.
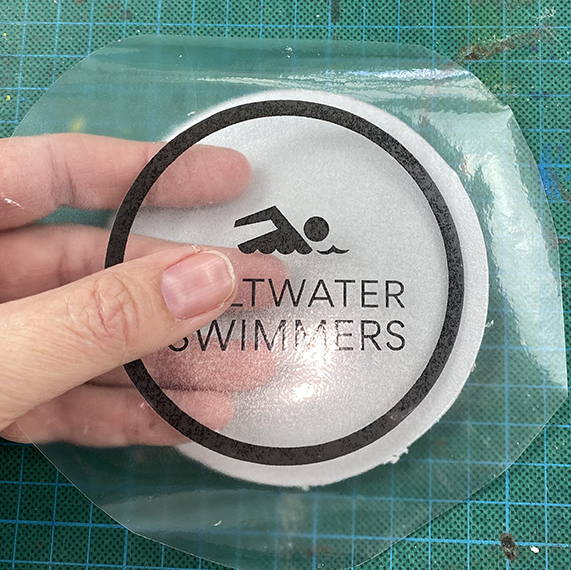
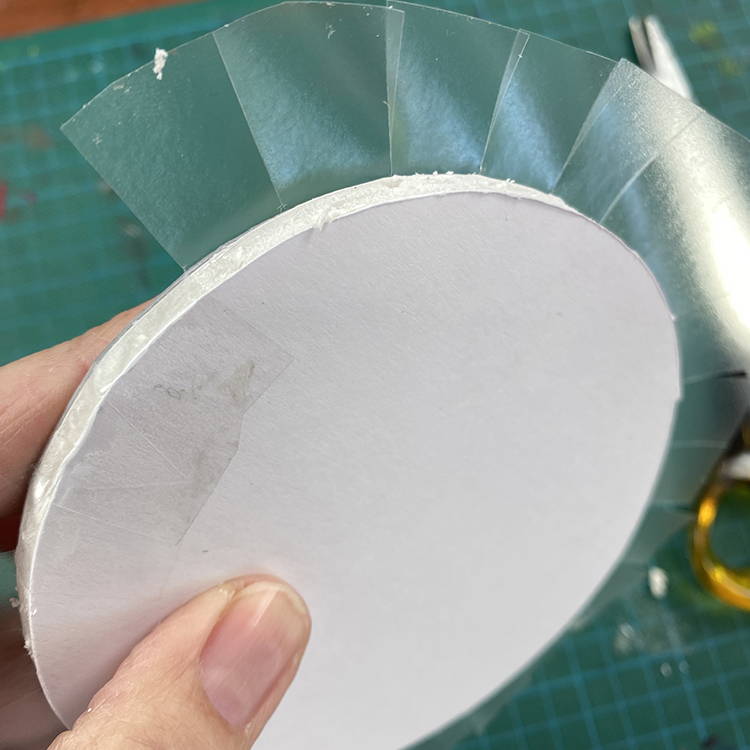
Step 5 - cutting contact out
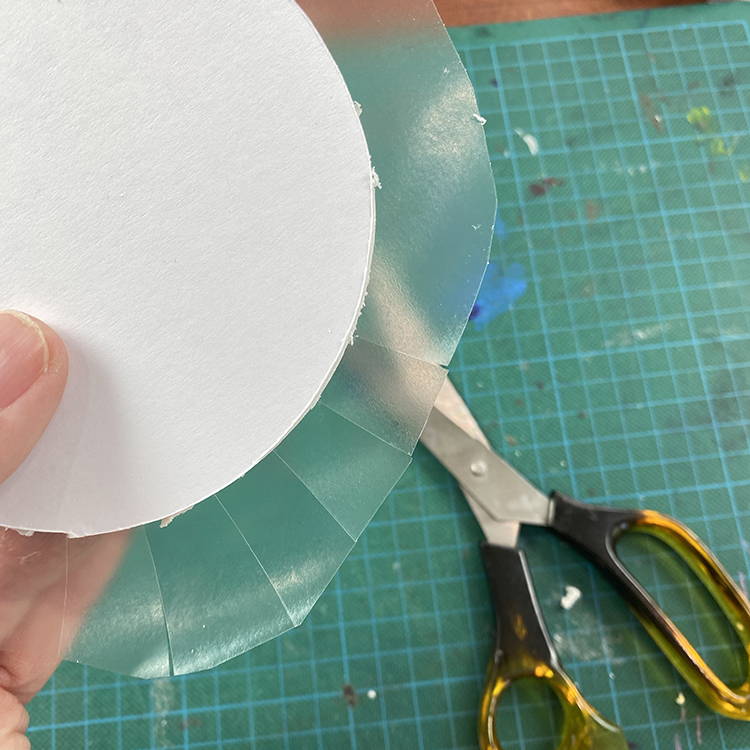
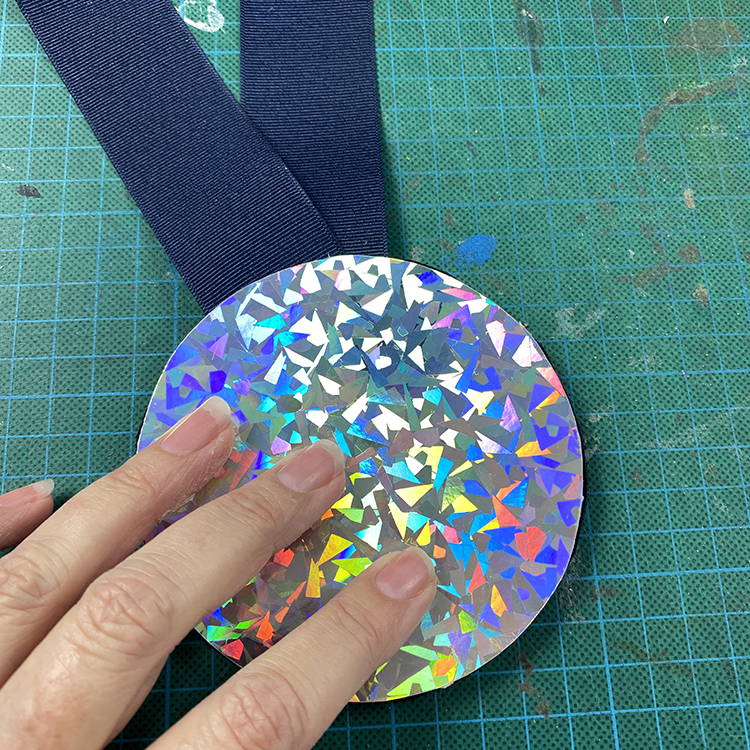
Now cut out a piece of contact that is at least 2cm larger in diameter to your logo, which is printed on the acetate. Peel the backing off so the sticky side is facing up and lay your logo down, with the logo facing the sticky side. Now carefully place this over your sparkle paper foam circle and all the edges should neatly stick down. Flip your circle over and with scissors, make neat little cuts (about 1cm wide) around the circle and then fold them all over to the back of your circle. You need to be quite firm doing this so that you don’t end up with a wonky rim.
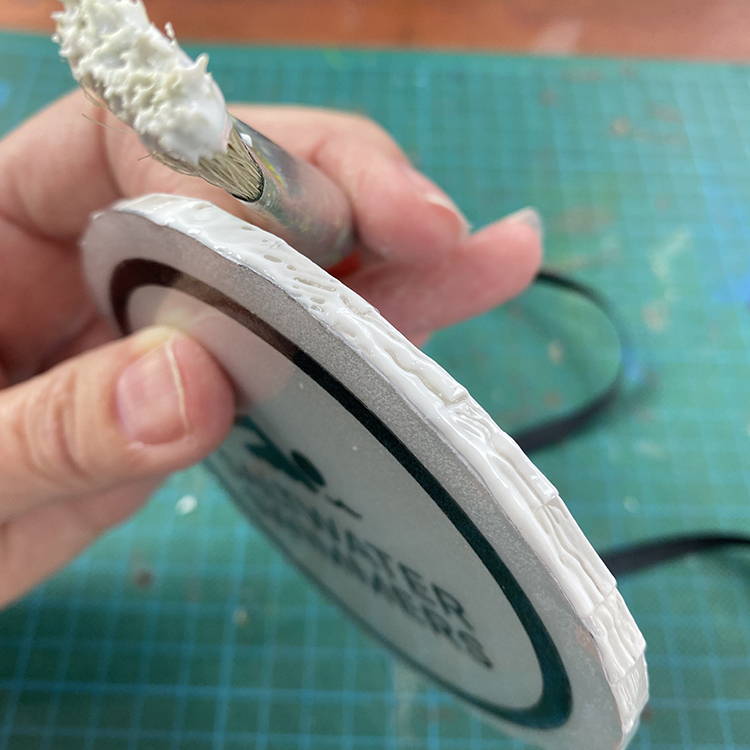
Step 6 - glueing edge
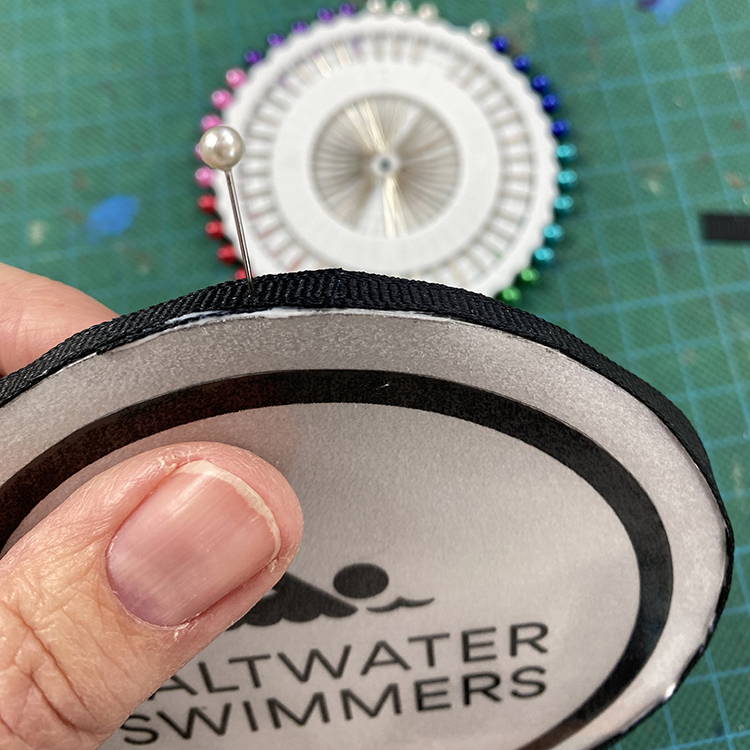
Take your thin ribbon and measure how much you need to cover the width of your medal allowing for an overlap. With your glue brush, apply glue to the circumference of edge of medal and then lay your ribbon down on top, making sure you start at the top of the medal. Then when you have done this, carefully put a pin with ball head through the top of medal. This secures the ribbon and also just looks nice.
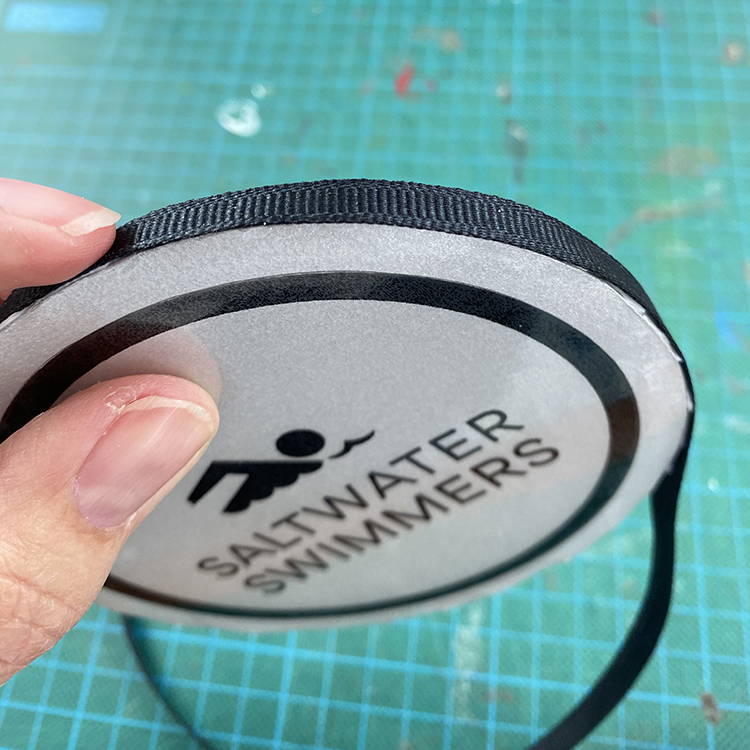
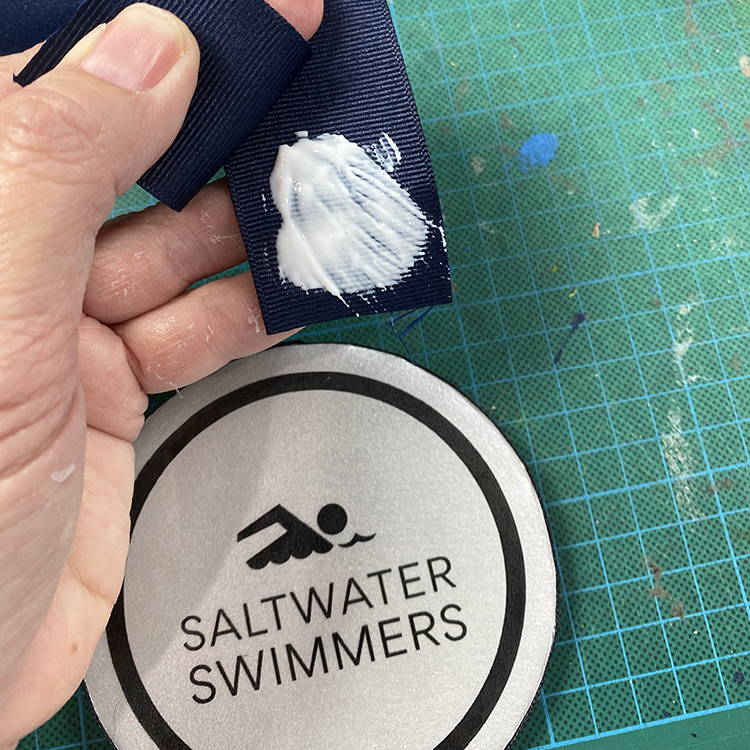
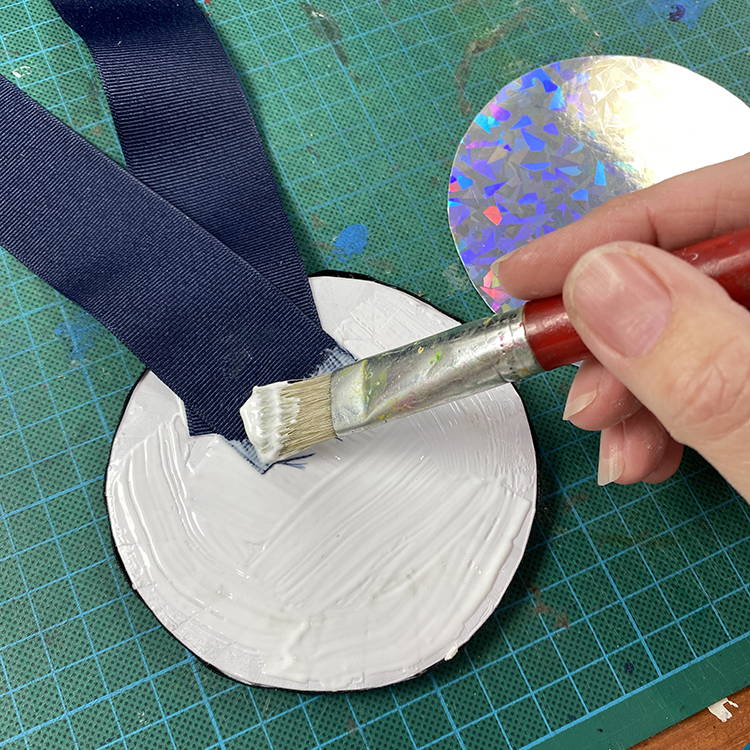
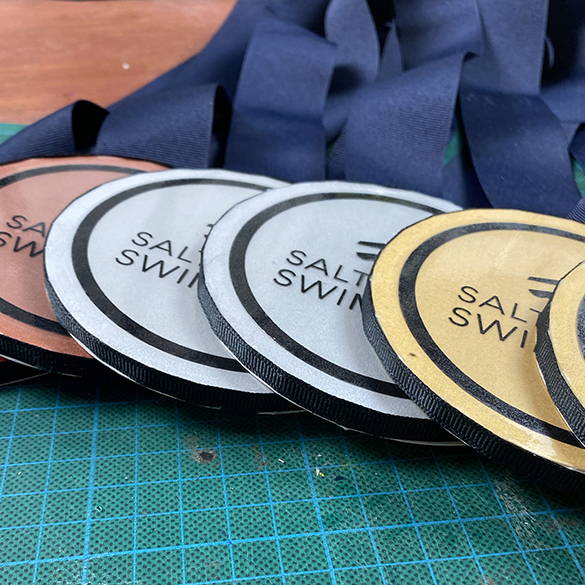
Step 7 - glueing sash & back
Now measure how much sash ribbon you will need and cut to size. Add some glue to one end of ribbon and attach other end to it. Then add more glue to end of ribbon and stick down to the back of your medal. Try not to move your medal around too much by this step as you have glue that is drying. Then put glue over entire back of medal and stick down an extra circle of sparkle paper. For mine, I had already bought a different sparkle paper from Officeworks, before finding the bronze paper at Spotlight, so I decided to use this sparkle paper for the back of the medals.

Step 8 - let dry
Now your medal is finished but must dry so it needs to be laid under something heavier, allowing all the glue to dry and get strength. Thirty minutes is ample for this.

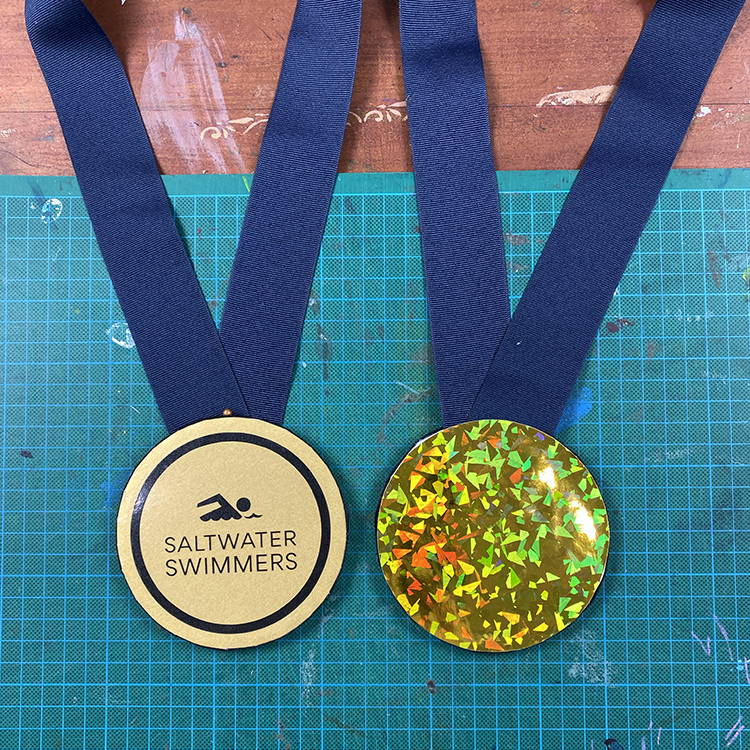
I hope you enjoy making these medals as much as I did and hopefully your Games won’t be cancelled like ours were. We will now use them at the end of season, they are too good not to be used.
Make sure you show Mrs Red your medal making! You can either email me at create@mrsreds.com.au or find me on socials. I would love to see how you went.
Go for GOLD!
Mrs Red
x